How I Turned My Old Laptop into a Ubuntu Server
From dusty hardware to dev powerhouse
Introduction
I've always wanted to learn more on building products from end-to-end. Truth be told, deployment is always something that I often get stuck with because as a newbie in this tech field, it requires more than just coding and developing applications. This is something that I always struggle before this. Not to mention it can be costly and you need to pay to host something. Ofcourse there are some free hosting services out there but let's be honest. Those free services always put their own domain and our application will just be the subdomain of it. So here where it comes the idea to make my old laptop into a server that eventually can be my playground on trying new things.
Windows, MacOS or Linux?
MacOS? - If you can afford to buy this for sure you can afford the cloud services for hosting and domain.
Windows? - Most user use this but it is hard to configure and it is bloated with a lot of unnecessary for hosting. (Trash XD)
Linux? - Lots of distribution that you can choose. Ex: Linux Mint (I use this as a dual boot during my studies, we'll talk about this later when I have free time which I maybe not),
Fedora Linux, Arch Linux, Kali Linux (Cybersec stuff, I'll probably venture it 'one day'), Ubuntu and many more.
At first I did try to boot up Ubuntu Server but it didn't go well. The installation process was completed but then I encounter a lot of issues such as network, usb port, etc.
So I decided to change to Ubuntu Desktop as it is much more beginner friendly.
My Old Hardware Specs
Here is my hardware specs. Yeah, it is a bit old but if it's working, you still can do cool stuff with it. It even use DDR3 (dunno if it still being produce).
| Component | Details |
|---|---|
| Laptop | Lenovo Ideapad |
| RAM | 4GB DDR3 |
| Storage | 256GB HDD |
| GPU | GeForce GTX 950M |
| CPU | Intel |
Installation Steps and Guide
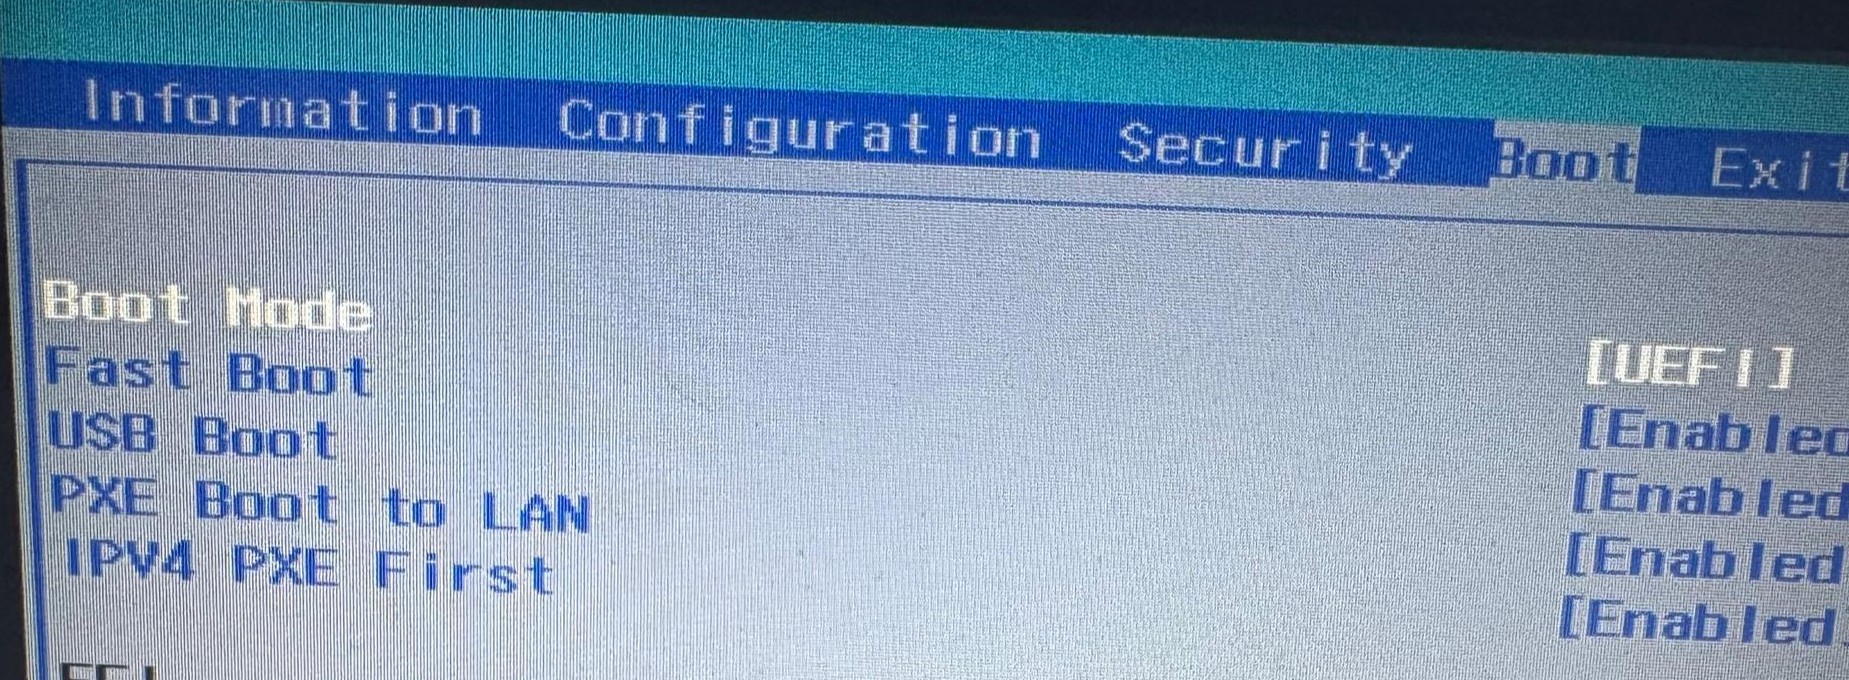
Please make sure you have a disc or USB with no data because you will need to write the image and format it into the storage medium. It doesn't need a big storage 8GB is more than enough. I'm using a 64GB USB that I bought (can't find smaller ones). I have my old USB but it doesnt support UEFI and only Legacy Support. Where you will find UEFI and Legacy Support? You will find it if you go to the laptop firmware settings on the boot section and by default our computer are boot using UEFI. Based on suggestions, it is better to boot using UEFI instead of Legacy Support due to security reasons.
- Download the Ubuntu Server ISO or Ubuntu Desktop ISO.
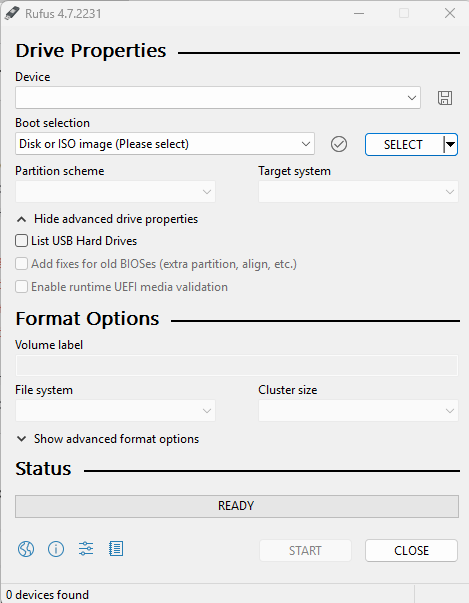
- Create a bootable USB or Disk with Rufus if you're on Windows. If you're on Linux, usually it will have their own built-in disk image writer (Startup Disk Creator, etc)
- Plug in the bootable USB that have Ubuntu Desktop in it and restart your Laptop/PC. Then, during boot-up tap/hold/press F12 (boot menu key).
- Select your USB stick to boot up and Try or Install Ubuntu when being prompted.
- Finally, just go through the installation wizard and you'll be fine.
It may take a while for it to download. 3GB for Ubuntu Server and 6GB for Ubuntu Desktop
Here is how it will looks like if you're using Windows.
The boot menu key depends on your hardware. Usually it shows temporarily when your computer boot-up.
If your USB doesn't show up, you probably need to enable the USB Boot in the firmware settings at the boot section.
🔧 Post-Installation Setup
I've setup my Ubuntu Desktop to enable SSH. It will work if your devices are in the same network.
The hashtags (#) are comments. If you copy and paste to the terminal, it won't do anything.
        # Update and upgrade packages
        sudo apt update && sudo apt upgrade -y

        # Install OpenSSH for remote access
        sudo apt install openssh-server -y

        # Enable SSH service
        sudo systemctl enable ssh
        sudo systemctl start ssh
I'm writing this blog/article remotely on my old laptop through SSH and it is supercool! So, that is all for this writing of mine. Thank you for reading! Till my next writings.
Contact Me
If you have questions or would like to be in touch whether to improve the project (or want to collaborate), feel free to reach out. I'm also open to learn from others.